
Multitasking is a breeze when you know how to split your screen on Windows. Whether you’re comparing documents, watching a video while browsing, or juggling work and chat, splitting your screen lets you see two (or more) apps side by side without constant switching.
Windows offers builtin tools to make this seamless—no extra software required! In this guide, we’ll walk you through how to split screen on Windows 10 and 11, using keyboard shortcuts, mouse tricks, and advanced layouts, so you can boost your productivity in minutes.
Why Split Screen on Windows?
Here’s why splitting your screen is a gamechanger:
Efficiency: Work on two tasks without flipping between tabs.
Focus: Keep reference material visible while you type or edit.
Convenience: Chat, browse, or stream without losing sight of your main app.
Ready to master this? Let’s dive into the methods!
Method 1: Drag and Snap with Your Mouse
The easiest way to split your screen is by dragging windows into place. Here’s how:
1. Open Your Apps
Launch the two apps you want to use (e.g., Word and Chrome).
2. Minimize or Maximize
Ensure both windows aren’t fullscreen—click the Restore Down button (middle icon in the topright corner) if needed.
3. Drag the First Window
Click and hold the title bar of the first app.
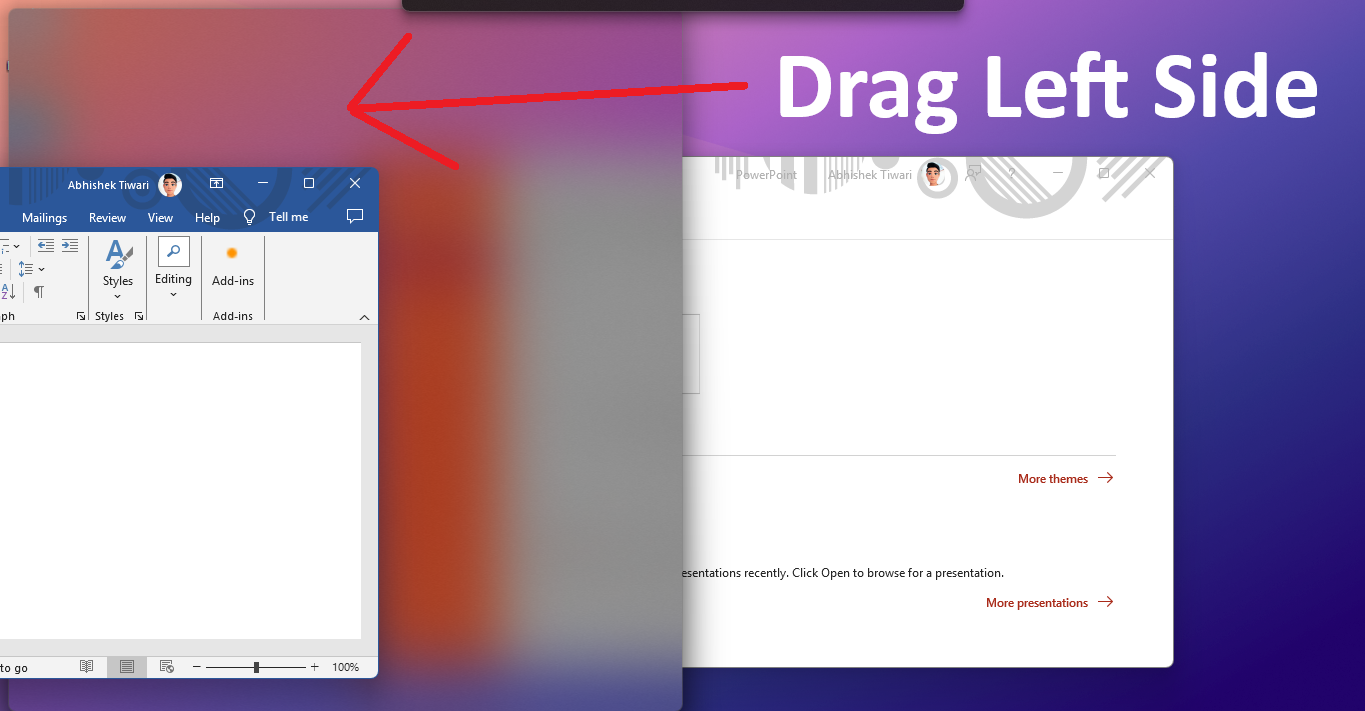
Drag it to the left edge of your screen until a translucent outline appears.
Release, and it snaps to fill the left half.
4. Snap the Second Window
Windows will show thumbnails of your open apps on the right.
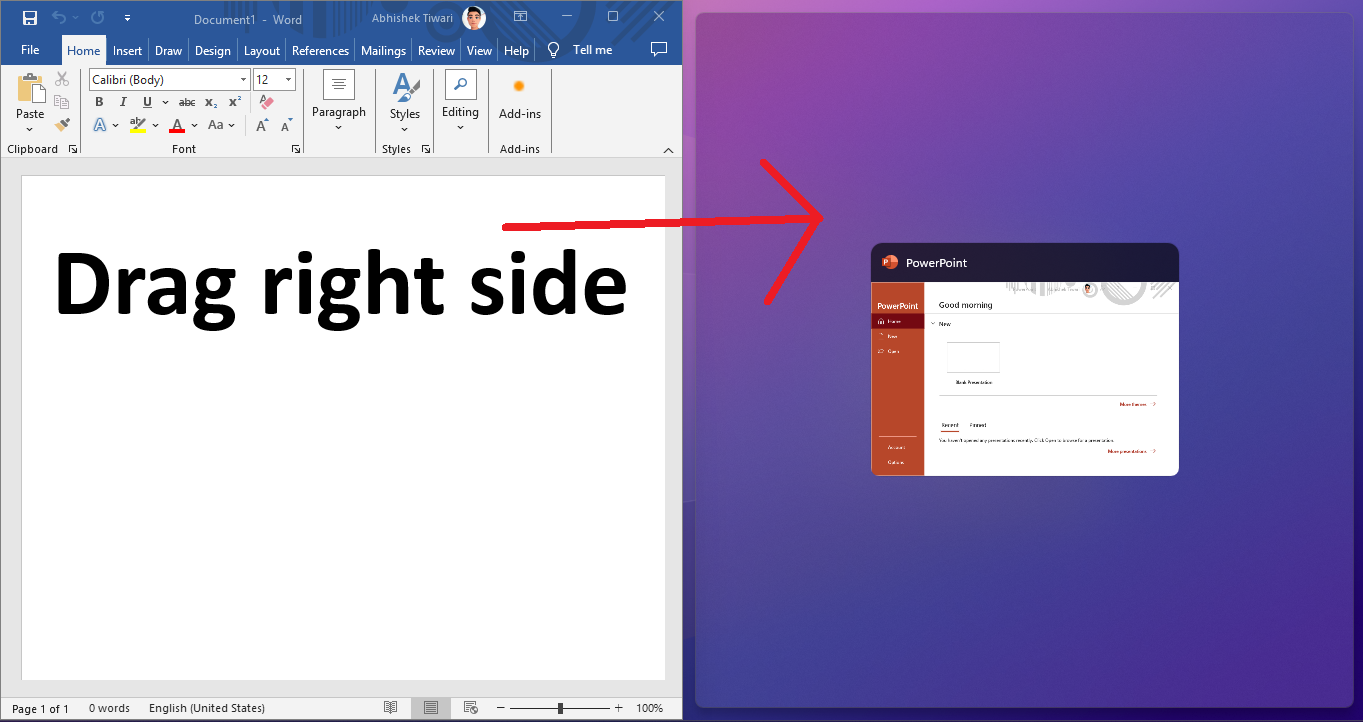
Click the second app you want—it snaps to the right half automatically.
Or drag it to the right edge manually if you prefer.
5. Adjust the Split
Hover over the dividing line between the apps until a doublearrow cursor appears.

Drag left or right to resize each side as needed.
Works On: Windows 10 and 11.
Pros: Intuitive, no shortcuts to memorize.
Cons: Limited to two apps unless you tweak further (see below).
Method 2: Use Keyboard Shortcuts (Snap Assist)
For a faster approach, use Windows’ Snap Assist with your keyboard. Here’s how:
1. Open Your Apps
Launch the apps you want to split.
2. Select the First Window
Click the first app to make it active.
3. Snap It Left or Right
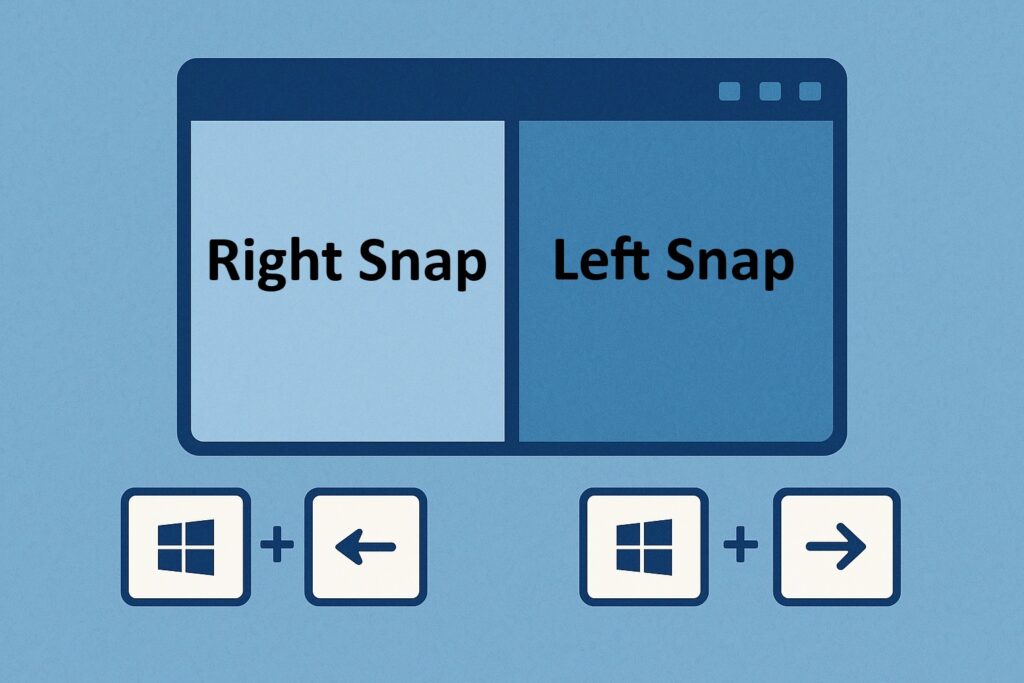
Press Windows Key + Left Arrow to snap it to the left half.
Or press Windows Key + Right Arrow to snap it to the right half.
4. Snap the Second Window
Windows displays thumbnails on the empty half.
Use the arrow keys to highlight your second app, then press Enter to snap it.
Or repeat the shortcut with the second app to the opposite side.
5. FineTune
Use the mouse to drag the divider if you want one side wider.
Works On: Windows 10 and 11.
Pros: Quick, handsonkeyboard friendly.
Cons: Requires a bit of practice to nail the sequence.
Method 3: Split Screen into Four Quadrants
Need more than two apps? Windows lets you split your screen into quarters. Here’s how:
1. Open Your Apps
Launch up to four apps you want to view.
2. Snap to Corners
Drag the first app to the topleft corner until it snaps into a quarter.

Drag the second to the topright corner, third to bottomleft, and fourth to bottomright.
Or use shortcuts:
Windows Key + Left Arrow, then Windows Key + Up Arrow for topleft.
Adjust with Up/Down/Left/Right arrows for other corners.
3. Fill the Screen
Keep snapping until all four quadrants are occupied.
Works On: Windows 10 and 11 (best on larger screens).
Pros: Great for heavy multitasking.
Cons: Small text on low resolution displays.
Method 4: Use Task View for Advanced Layouts
Task View offers a visual way to manage multiple windows. Here’s how:
1. Open Task View
Press Windows Key + Tab or click the Task View button (two overlapping rectangles) on the taskbar.
2. See Your Open Apps
Task View shows thumbnails of all open windows.
3. Snap Manually
Drag a thumbnail to the left or right side of the screen to snap it.
Pick another thumbnail for the opposite side from the Task View panel.
4. Repeat for More
Add more apps to corners if desired.
Works On: Windows 10 and 11.
Pros: Visual, good for multiple monitors too.
Cons: Slower than shortcuts for simple splits.
Method 5: Split Screen with Multiple Monitors
Got extra screens? Extend your splitscreen powers across monitors:
1. Connect Your Monitors
Plug in your second monitor via HDMI, DisplayPort, etc., and ensure it’s detected (Settings > System > Display).
2. Set Display Mode
Press Windows Key + P and choose Extend (not Duplicate).
3. Snap Across Screens
Drag or use Windows Key + Left/Right Arrow to snap apps on each monitor.
Each screen can hold two (or four) apps independently.
Works On: Windows 10 and 11 with multiple displays.
Pros: Doubles your workspace.
Cons: Needs extra hardware.
Tips for Perfect Split Screening
Maximize First: Start with fullscreen apps for smoother snapping.
Turn On Snap Assist: Go to Settings > System > Multitasking and ensure “Snap Windows” is enabled with all options checked.
Resize Easily: Drag the divider to prioritize one app over another.
Experiment: Try vertical splits (Windows Key + Up/Down Arrow) for tall windows.
Troubleshooting
Snapping Not Working?
Check Settings > System > Multitasking—toggle “Snap Windows” off and on.
Restart Windows Explorer via Task Manager (Ctrl + Shift + Esc > Processes > Restart Windows Explorer).
Apps Won’t Snap?
Some older apps don’t support it—update them or use Task View.
Divider Stuck?
Minimize and resnap both windows.
Final Thoughts
Splitting your screen on Windows is a productivity superpower—whether you’re dragging with your mouse, zipping around with shortcuts, or spreading out across multiple monitors.
Windows 10 and 11 make it intuitive and flexible, so you can tailor your setup to any task. Give these methods a spin, and you’ll wonder how you ever managed with one app at a time!
I am an extensive connoisseur of windows problem-solving techniques and everyday tech tips and tricks.
RELATED POSTS
View all